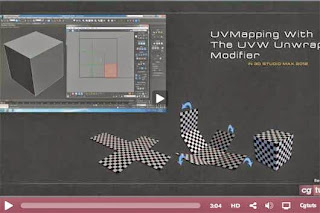
A UV layout is a visual representation of a 3D model flattened onto a two dimensional plane. Each point on the two-dimensional plane is called a UV and represents a vertex on the 3D object. In this way, all areas within the boundary of the UV layout correspond to a specific spot on the model. An easy way to visualize what a UV layout looks like is this:
Have you ever made a cube out of paper? If so, think about the shape you needed to cut into the paper in order for it to properly fold into a cube—it probably looked like a cross, four units (faces) high and three across. If that paper cube were a 3D model, every fold would be an edge, every corner would be a vertex, and every flat area would be a face. Unwrapping a model is very similar, except there are usually more than six faces to flatten.
Unwrapping: Unwrapping is the process of assigning each polygonal face a set of UV coordinates on the two-dimensional image plane. UV coordinates are layed out visually and exported as a square bitmap image with a resolution anywhere from 512 x 512 all the way up to 6000 pixels by 6000. The artist who paints or creates the texture maps for the model will eventually use the layout for guidance when creating the texture files.
Examples of what unwrapping a model looks like:
Examples of how your final UV gun layout should look like in the UV editor:
Tips &Tricks
·
Try to make all the parts of your model
proportional in size to one another; you don't want a face of a character to
take the same space as a button on this right pocket.
·
Whenever you stitch uv's together, you are
closing seams.
·
Wherever the uv shell is open, that is where
your seam will be.
·
Knowing that you will have seams, move them into
places where they will be less noticeable and hidden from the viewer.
·
The best thing to think about when it comes to
seams, is to think about where they would be naturally. Look at objects such as
clothes, patterns, and other manufactured things for reference.
·
Use the Relax tool whenever you have any areas
bunched up or to quickly clean and flatten your uv's.
·
Maximize the one by one uv space in your uv
editor. Try not to leave allot of negative space.
·
If you have allot of part or pieces to your
model that you are trying to unwrap and put in the same space see what you can stitch
together that would make sense.
·
You do not want allot of little pieces/uv's.
·
If there are small parts that will never be seen
by someone in your model, then you don't have to worry so much about them and
can just unwrap them but leave them to the side. Also when you get to the point
where you are packing your uv's into the one by one space, you can scale them
down so that they do not take up allot of space.
·
Scale up the uv's that will need to show the
most detail when it comes to texturing time. The areas of most detail on your
model need to take up the most space in your uv space.
·
If you want an area on your model to have the
same texture, this is the only time when you would have uv's overlap each
other.


